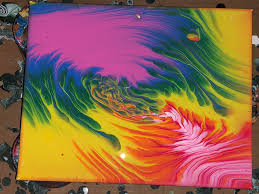
A very fascinating technique of doing the acrylic painting is a fluid art, or commonly known as acrylic pouring. This is done by mixing acrylic paints and a pouring medium and other additives as and when required.
Acrylic pouring is simply brilliant! you just pour a lot of paint on the canvas, tilt the canvas and then just see how it creates different effects and patterns. Fluid painting can easily be done by beginners and you don’t need to have any prior knowledge. You don’t even need a lot of time to do this and it can be done in a mere 30 minutes as well. The best part of doing this painting is that it is lots of fun! It is definitely a little messy but what’s painting without a little mess!

In this article, I’ll take you through how acrylic pouring works, what techniques there are, and what supplies you’ll need. First of all, here is a small fluid painting tutorial that will cover all the three points that I mentioned above.
1. The first and foremost thing that you need to set up is your workstation. You need to protect the surface from the paint that will drip and/or spill from your canvas. Covering the work station with plastic sheets, newspapers or tarpaulin is the best. This will ensure that all the dried paint and splashes are easy to clean and remove. This will keep your work station neat and clean irrespective of messy you were.
2. Then you need to get all your equipment and paints ready so that you have everything on the spot. Next, you wear your gloves and then you’re all set to begin pouring paint.
3. Start mixing! Use a cup or container, whatever you prefer, and put some acrylic paint into it. Then take a pouring medium and add double the medium into the paint. Make sure that you read the instructions on the medium because you don’t want your paint to become the very thing that it just becomes runny and spreads everywhere. There is a risk if the paint is too thin and it can ruin the whole painting.
4. Mix the paint and the medium and wait till it turns into a homogeneous mixture. If the mix becomes a little too thin, you can just add a little water and mix the colors and mediums again.
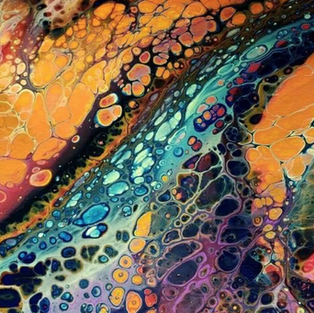
5. If you want to have the effect of cells in your painting, you can just add a few drops of silicone oil and roughly fold it in. Leave the mixture for a little while and let the bubbles rise. Now you’re all set to pour the actual paint.
You can call it fluid art or liquid art or acrylic pouring but there is nothing more satisfying than watching the colors flow and creating a masterpiece. This form of art uses acrylics in a runny consistency to create the psychedelic patterns we find magnificent. There are endless possibilities and patterns that one can create with fluid painting. It is so satisfying to watch paint spill across the surface!
Acrylic Pouring Supplies
The key to a good fluid painting is the consistency of the paint. Other than acrylic paints, you need pouring mediums as well. While acrylic paints in itself are quite thick, it is better to add a medium to give it a better consistency. What medium you add shows in the final piece with respect to the color and its layers, or a wash pour or will the finished piece look like layers of watercolors. If you don’t have a professional medium, you can add a little to manipulate the consistency of the paint. You’ll learn how different techniques and how a medium affects them.
By experimenting and changing things up, you’ll discover all types of fun effects.
Liquitex professional pouring mediums is one of the most popular ones out there as it helps in creating even sheets and puddles. Another one that can be used is GAC 800. This one helps prevents fissure from appearing on your masterpiece. If you want to invest a little too much, you can go for Floetrol. It is effective and also doesn’t burn a hole in your pocket. If you don’t want to use these, then you can use rubbing alcohol/isopropyl alcohol to create the effect of cells. A ratio of one part acrylic colors, one-part isopropyl
alcohol and two-part medium will give you some amazing results.
Other than these, one can use glue, silicone, and coconut oil as well. Each of these will lead to a different and mesmerizing pattern but there will be differences in the properties of the paint depending on the medium you chose.
Acrylic Painting Techniques
Experimentation is definitely the key and, in this article, I will tell you about the 2 main techniques that are commonly used; the straight pouring and the dirty pouring. Whatever technique you use, make sure that your surface is even to get the best results possible while pouring as well as while drying.
Straight Pour
A straight pour simply means you pouring colors one by one onto your surface. This leads to building up of layers one by one. One method involves pouring colors to form puddles on the surface which are then tilted so that the color spreads everywhere evenly. It provides a nice, crisp, and even coating of color and gives a feathery effect. You can also swipe them to create another mesmerizing effect.
Dirty Pour
Dirty pour on the other hand means all the colors are placed in a cup or a container together and poured on the canvas or any surface you are painting on. consistency is the key here. If the colors are too runny, the effect will look muddy and it also did not work well with the pour. This technique is great because it depends more on the instinct and you never really what effect and in what form will the colors come out of the cup! Once you get the desired consistency, you can create different effects with an array of colors and you’ll see that anything is possible.
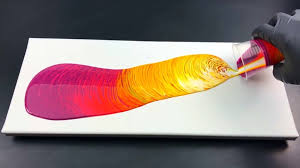
You can also go on a more experimentative path and use a flip cup or the funnel technique. In a flip cup technique, you place the canvas on top of the cup filled with color and you just flip the whole thing and raise the cup. Lifting the cup releases the colors and lets them spill over the surface. A funnel technique on the other hand requires you to block the end of the funnel with a finger while you keep pouring paint into it and
once you are happy with the amount of color in it, you just remove your finger. Then you can just let the color drizzle on your surface and see something magical being created.
Puddle Pour
Puddle pour means is exactly as the name sounds. Each color that you want to use is poured directly onto the canvas to form a puddle like an effect. One-color is taken as the basis and then each color is added into it after that.
Each color is first mixed individually in a 1:1 ratio of paint and the pouring medium and thoroughly mixed. Additional drops of silicone oil might also be added to give the effect of cells on the canvas. The base color is put on the center on the canvas and then each color is added into it and around it as well. Once all the paints are added in the desired quantity, the canvas is picked up from the flat surface and tilted and moved to allow the color to spread and cover all the corners. What the result is, is unpredictable but stay to be amazed as it will always be something magical indeed.
Swirl Pour
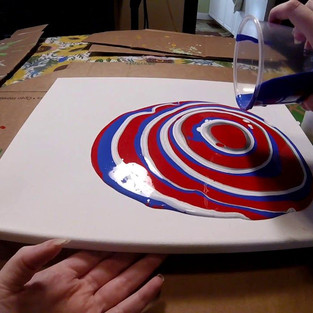
This technique works out a little differently; the paint is applied onto a canvas but not in a normal method. Rather, it is applied in circular motions to create a pattern that appears like a swirl or the rings of a tree. The best way to work this lout is to first mix each color separately with a pouring medium. Once each of these is individually created, they are all mixed in a big container, one on top of the other. This is when the exciting part begins; now you need to pour the color onto the canvas in circular motions to achieve the effect of the growth of tree rings in the wood.
In order to achieve this, paint is poured slowly and carefully until the ‘tree ring’ has appeared over the painting. Once you have achieved this, start tilting the canvas around so that the tree effect spreads and the result corresponds to the ideas.
Wing Pour
A modified version of the ‘swirl’, a wing pour has one aim; creating two similar wings on the canvas or whichever surface you are using. The process to mix the color is the same; paint and pouring medium in equal measures. Then the colors are put into a container – the color in between the wings is poured first and start adding the second color from one corner. Once that is done, add this color from a corner onto the canvas and repeat the same on the other half of the canvas.
You can even add a third color to add to the essence of fluid art and this will appear on the outside of the wings. Then shift the whole canvas; raise the canvas a little onto your side and just pour the paint in the middle of the painting. Raising it like this is different than other techniques; this will make the paint run away from you, which in turn will create a long wing shape.
Now that you know how interesting this technique is, go ahead and try it, see how satisfying the process is and go create mesmerizing patterns of your own!












Comentários